

Just took a look here in Quantum Design and realized how barren and empty this blog site appears. That’s because at this point it IS empty and bare. That’s the result of not actually having a purpose or need. My bad. But I create many blogs like this just because I can. I say that over and over.
Quantum Design seems to infer this blog should be about design. That wasn’t much of an intuitive leap. That is what I was thinking when I created this site.
I currently design and create 3D printed items. Usually on the small size as that is a limitation of a hobbyist 3D print machine. The lower limit can be extremely small. Thumb-nail size. Printing large items needing assembly is part of the design planning and can be far greater than the size of the print area when finished.
3D printing has never had an all one piece design limitation. Design/make smaller components then assembling them into much larger creations. Much like the plastic assembly model kits I used to put together as a kid.
But today I get to design the model or item from scratch. Not just follow along assembling other peoples designs.
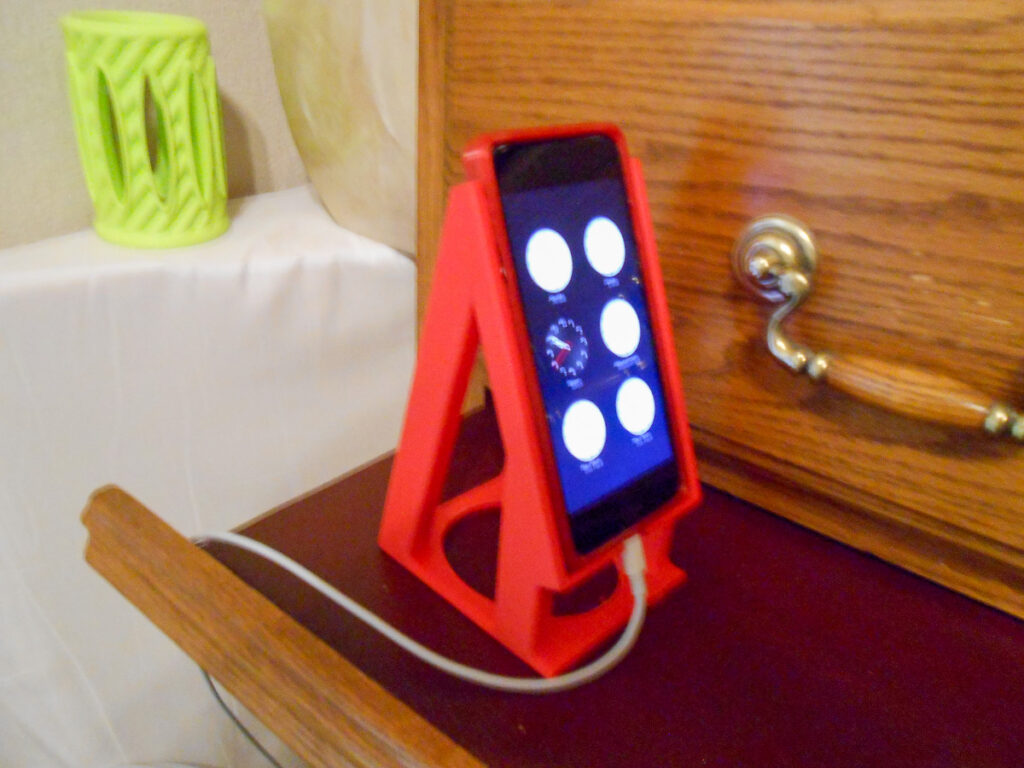
Here is my latest. I know its been done many times by many people before. But it is the first time for me.
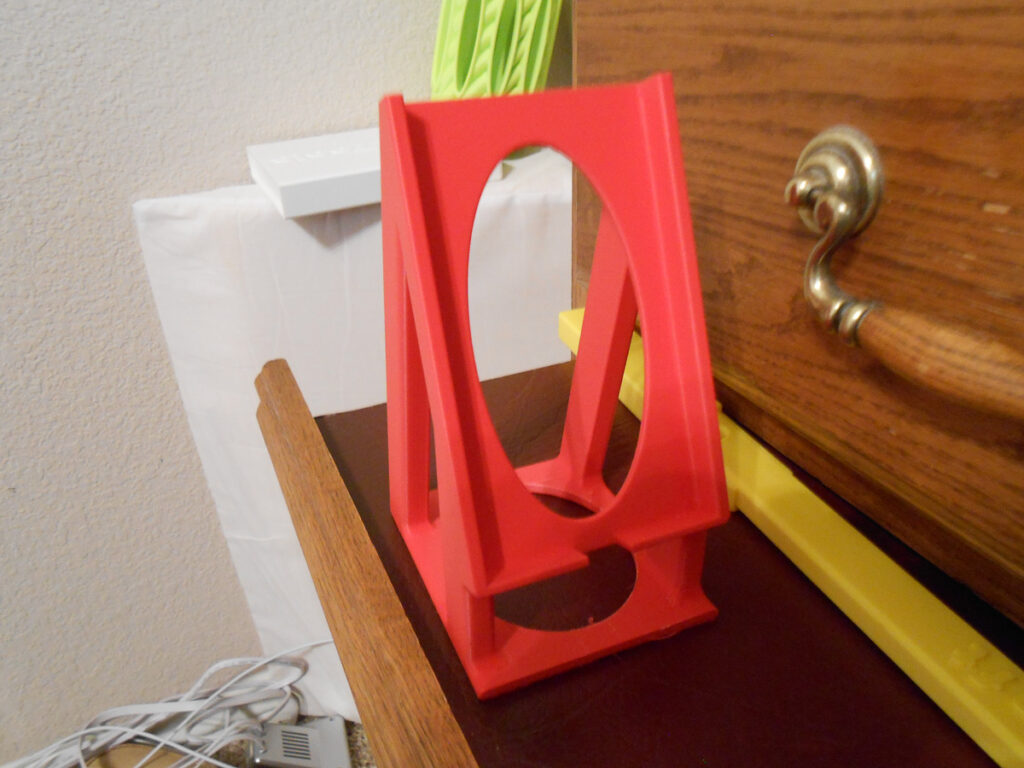
I decided I wanted my cell phone at my bedside to be in a stand so that I could read the time without lifting it off the shelf. It’s also when I charge the phone for the next day operation. So it had to have the charge cord plugged in.
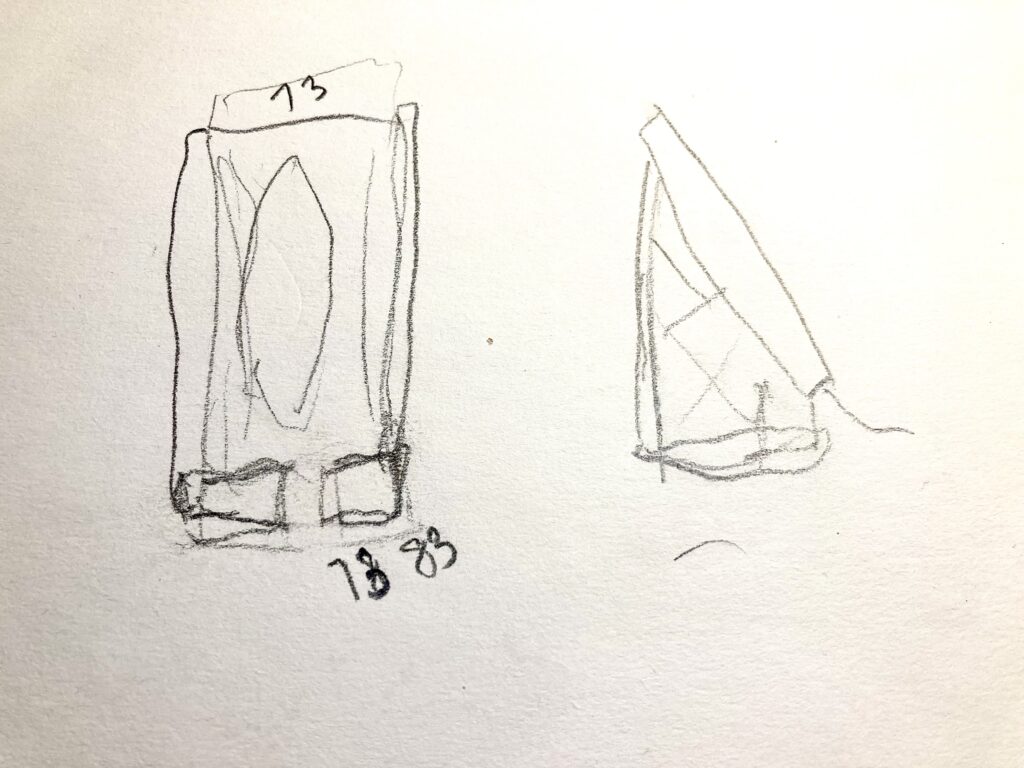
I sketch a rough idea on paper with a pencil and measure the phone for critical dimensions. I add a few measured dimensions to the pencil drawing for reference.
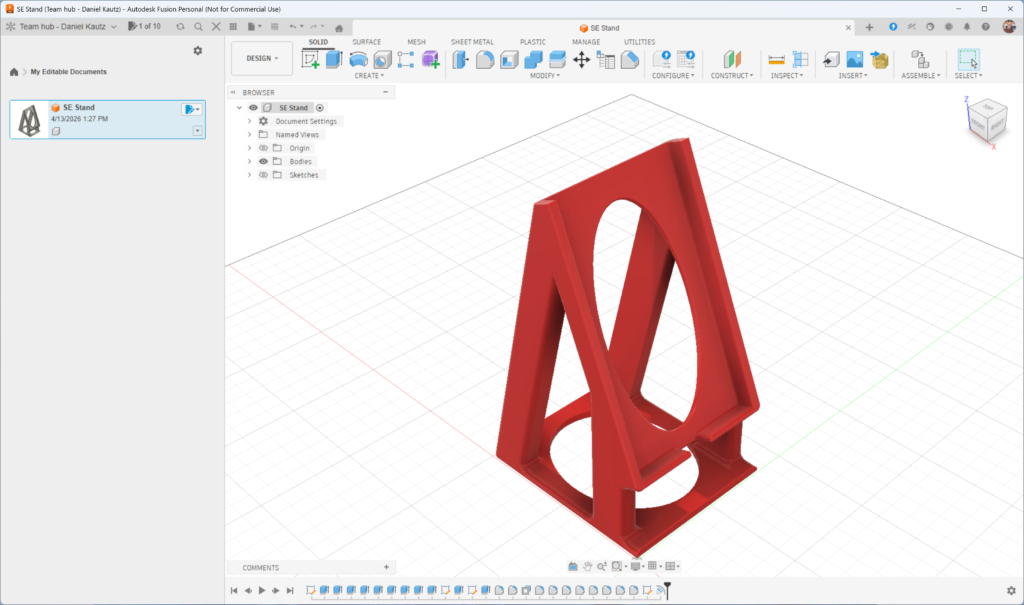
Next I jump to one of my computer CAD applications. 3D printing requires a TOTALLY ACCURATE 3D drawing of the object to be printed. Here is where my “real” creative juices start flowing.
CAD drawing like this can take a few hours. For me it is the most enjoyable time spent.
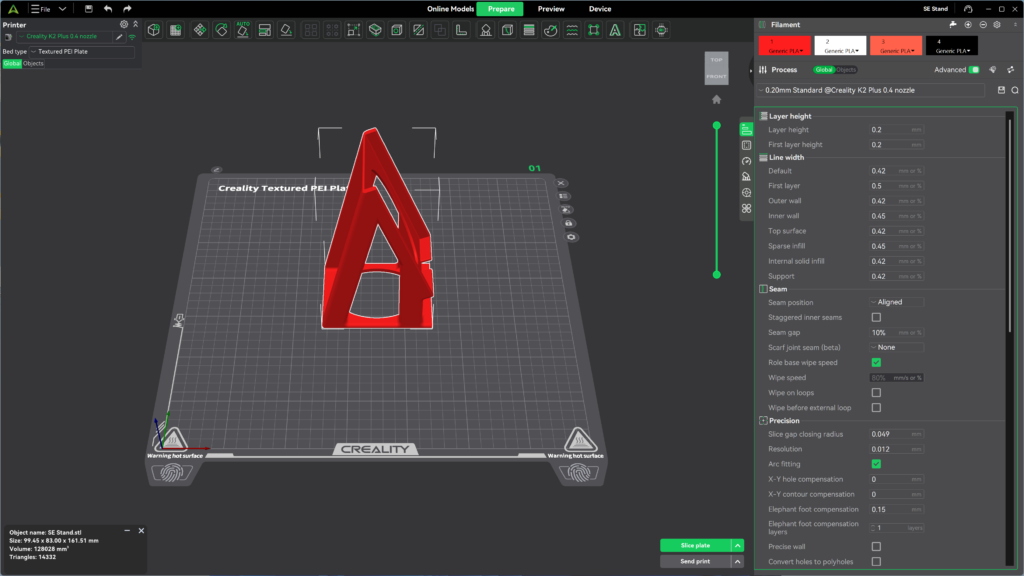
The next stage is exporting the CAD drawing to another computer application called the slicer. After checking and setting a very long list of variable settings, the drawing is sliced into printable horizontal layers. Hundreds and many times, thousands of ~0.20mm (more or less) thick slices.
The 3D printer then prints all the layers stuck together into the shape of the item.
The printing process, although interesting to watch, and is a process of creation, it is fully automated and has no imaginative creative effort of it’s own. Just following directions.
Leave a Reply