
I am a long time licensed Amateur Radio operator. Call sign W5EHS. I first started building electronics projects about age 10 in 1956. After my active Navy military service in 1969. an ET CPO John Petrec, W8BNO (SK), mentored me and gave me my novice operator test,
Now 56 years after my first radio license, and 69 years electronics experience, I am still fiddling with radio stuff.
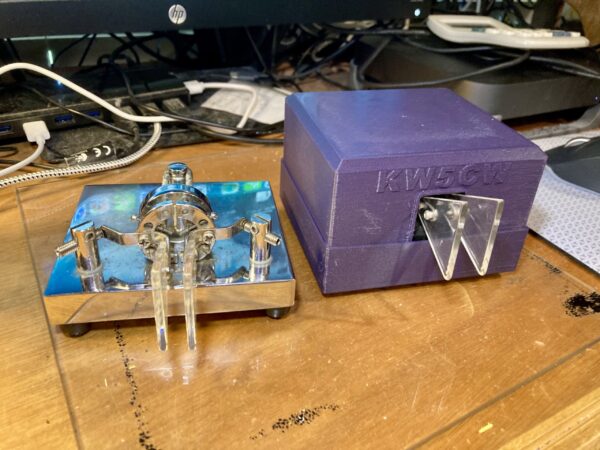
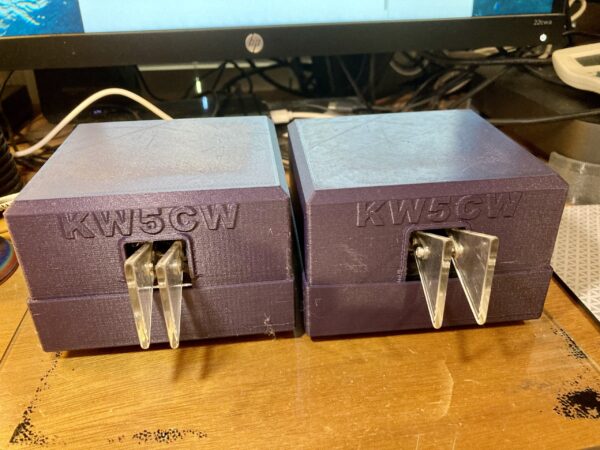
A long time fellow ham. Jim Frank KW5CW was in my Youngstown, Ohio – Mahoning Valley Amateur Radio Association (MVARA club) back in my early radio days. WE are both now in the Dallas, Texas area and of course keep in close contact. Jim asked me to help design/build this project.
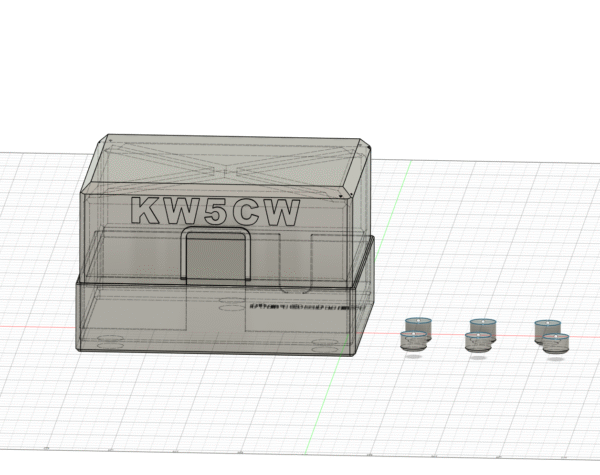
This project isn’t electronics. But it is hardware design/build from scratch. 3D printing to be exact. And it’s related to Ham Radio.
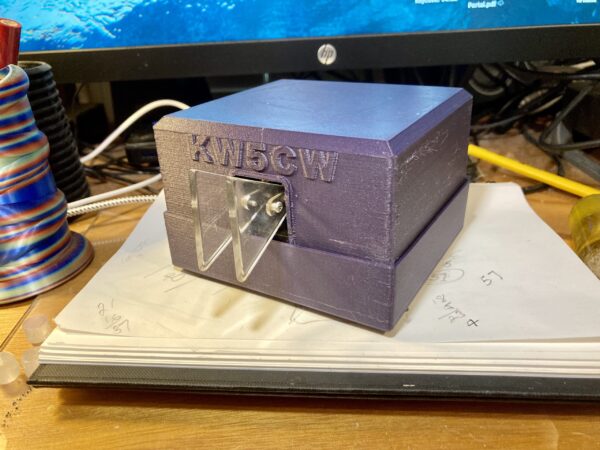
What is shown in the pictures are “keys.” Used when connected to an electronic ”Keyer” to form Morse Code CW (Continuous Wave), actually on/off radio signals, by slight movement of the “paddles” protruding from the front of the case, by interaction with a human thumb and side of index finger. In our case, over amateur radio, Long windy description but now you know. <G>
These are Bencher (brand) keys. Very heavy steel base with rubber feet so the key will stay stationary under use. A key is used with a very light touch and very little side force is required. Either of these keys, as shown with case, weigh over 3 pounds, by several ounces.
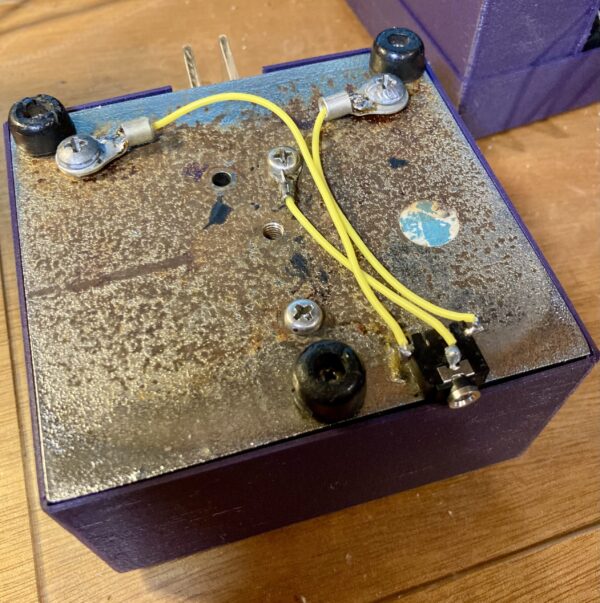
Jim made some mods to the wiring of his keys by adding 3 conductor plugs under the base. So the connector cord to the keyer or radio (with keyer built in) could be removed and stored separately.
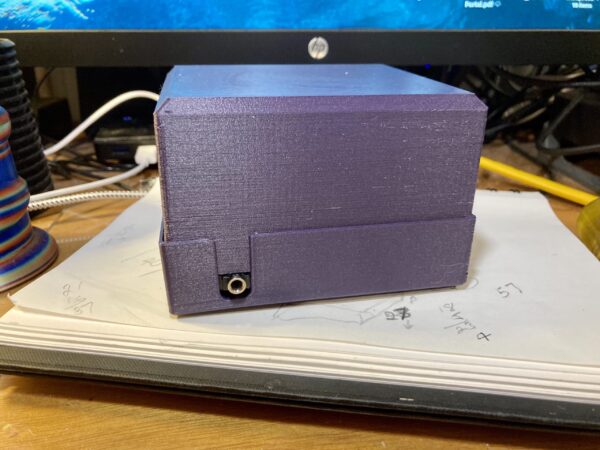
Jim’s request for me, was design a box to help shield the key’s “workings” and especially the open electrical point contacts. He uses these keys for remote (from home base locations) operation in state and local parks and other outdoor operations.
He didn’t want or need hermetically sealed kind of protection.
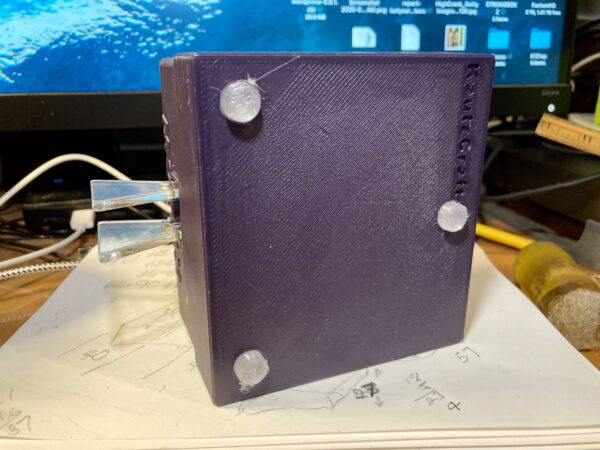
So this design is protective but not air tight by any means. Access needed for the paddles to protrude and access for cord jack.
The mated case halves are a fairly tight press fit with no fasteners needed. Occasional internal access is required for contact adjustments and cleaning.
The only parts fixed in place are the TPU printed feet using CYA (hot) glue,
The cases are PLA Carbon (30%) sold under the Creality brand.
CAD design was done using Autodesk Fusion. First version was done in about two hours. However, there have been many “tweaks” to the design up to this point.
The cable jack locations are not exactly the same on both keys. Jim epoxied the jacks on the bottom with no concern of future location standardization for a future case addition. <G>
No problem with CAD. the cut-out location was a quick adjustment in one drawing view. Then re-compile. So yes, there are now two versions. It’s called “custom design”. <G>
AS I keep saying I love the challenge of product design. Shape, form and function.
Leave a Reply